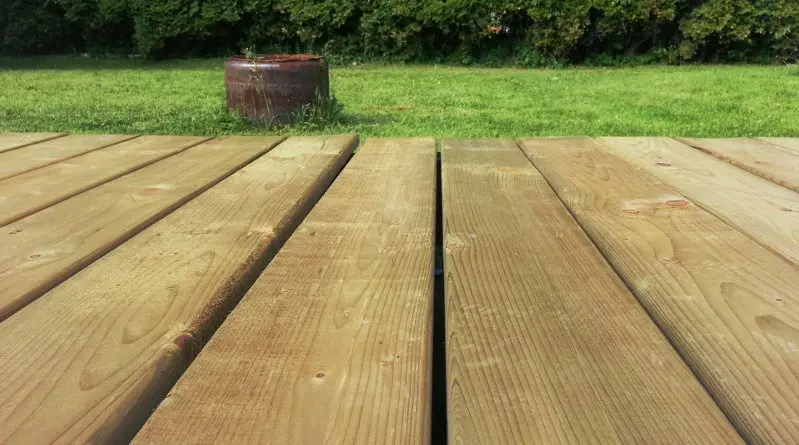
For many property owners looking to maximize their outdoor living space, the arrival of warmer weather sparks a familiar wave of ambition followed by the inevitable hesitation that comes with major landscaping projects. However, industry insights and home improvement advice point to a surprisingly accessible solution for flat, sound land: building a ground-level deck. Designed to bypass the most complex and labor-intensive aspects of traditional carpentry, this approach offers a streamlined alternative that can potentially be completed by a single motivated individual within the span of a single weekend, while still leaving open the possibility of disassembling and taking the structure along when moving house.
Unlike elevated platforms that require deep foundations, concrete footings, structural support posts, and safety barriers such as steps or balustrades, ground-level decking rests directly on or very close to the earth. This fundamental shift in design removes the regulatory hurdles and heavy structural engineering associated with raised platforms, provided the space is flat and sound enough to take it. With careful organization and thorough planning, homeowners working alone can tackle the project from start to finish without needing a crew of laborers.
Nevertheless, home improvement specialists caution that constructing a timber deck is rarely classified as an entry-level do-it-yourself task. For individuals who have spent little time working with wood or handling heavy timber, the project will undoubtedly test existing carpentry skills. Success hinges heavily on meticulous planning, patience, and a willingness to prioritize precision over speed. Rushing the process almost invariably leads to misaligned boards, uneven surfaces, and a compromised final aesthetic, whereas taking an extra day to measure twice and cut once separates a mediocre effort from a stunning backyard transformation.
Creating the Decking Frame
The foundation of any successful timber deck lies in the integrity of its outer frame and internal support structure. The process begins with verifying measurements and cutting all necessary bearers to form the perimeter of a square or rectangular layout. Once cut, these four primary members are laid flat on the floor in their correct positions and joined together at the corners using sturdy butt joints.
To ensure structural rigidity, builders are advised to use heavy-duty screws measuring at least 150mm in length, driving a minimum of two fasteners into each corner. Geometry plays a critical role at this stage; measuring diagonally across the frame in both directions ensures the structure is perfectly square. To lock this shape temporarily into place, a timber batten is nailed diagonally across one of the corners before any further assembly takes place.
Internal support is just as crucial as the outer perimeter. By measuring and marking points at precise 400mm intervals along two opposite sides of the frame, builders establish the designated positions for intermediate bearers. These extra structural supports not only prevent the frame from flexing under weight but also provide secure fastening points for the final surface boards. For homeowners choosing to use alternative materials such as decking tiles, the spacing between these support bearers must be adjusted to match the specific width of the tiles being installed.
Once the intermediate positions are marked and measured, the corresponding support bearers are cut, positioned, and anchored securely using 150mm screws. With the internal matrix complete, the entire wooden frame is fully prepared to be transferred onto its designated footings on the ground.
Preparing the Site for Decking
Site preparation varies significantly depending on the existing surface condition of the yard. When building over a flat concrete patio or an established area of paving slabs, extensive foundations are entirely unnecessary. In such scenarios, the frame can rest directly on the hard surface, though minor adjustments using thin timber off-cuts may be required at the corners to compensate for subtle undulations and achieve a completely level base.
When the deck is destined for a lawn or patch of soil, however, thorough ground preparation is mandatory. The process typically begins by using a tape measure and wooden stakes to map out the perimeter of the deck. By tying string tightly between the corner pegs, builders establish a clear visual guide for excavating and clearing the zone. For perfectly square or rectangular layouts, cross-diagonal measurements are once again employed to guarantee ninety-degree corners.
Over a lawn, a straight-edged spade is used to slice through the turf layer, dividing the grass into manageable strips that can be rolled up and relocated. On rough soil, large stones must be cleared, and the earth should be flattened using an old plank or similar straightedge. Because ground-level decks leave little room for error regarding height clearances, this leveling phase requires strict accuracy, verified continuously by placing a spirit level on top of a long plank.
Drainage dictates the next phase of foundation work. For well-drained soil that remains relatively dry, a weed-proof membrane cut slightly larger than the cleared footprint is laid directly onto the earth and weighted down with a 40mm to 50mm layer of gravel. Conversely, damp or poorly drained ground requires a more robust foundation strategy to protect the timber frame from persistent moisture. In these conditions, paving slabs are positioned at the corners and at regular intervals along the central span of the deck. These slabs sit atop the gravel base, serving as stable piers for the wooden frame. A long spirit level spanning between the slabs ensures uniform height, with adjustments made by tapping the stones down or adding more fine gravel beneath them.
An alternative method preferred by some builders involves removing the turf or topsoil entirely, placing the paving slabs in their intended positions, and tracing their outlines with a trowel. After lifting the slabs, an additional 25mm to 30mm of soil is excavated from beneath each marker and filled with fine gravel to match the surrounding grade. The slabs are then returned to these prepared beds, a weed-proof membrane is laid out around them, and the entire area is backfilled with gravel up to the upper surface of the paving stones.
With the foundation complete, the assembled wooden frame is carefully maneuvered into position on top of the slabs. Ensuring the structure rests evenly without rocking when stepped upon signals that the frame is ready to receive the surface boards.
Fixing the Decking Boards
The meticulous installation of surface boards is the definitive element that elevates a functional platform into a visually striking architectural feature. Careful measuring, precision cutting, and deliberate pacing are paramount. Experienced builders emphasize that spending an extra day refining the final details yields vastly superior results compared to rushing through the installation and compromising the finish. Standard practice involves cutting multiple boards simultaneously and treating all freshly cut ends with a reliable wood preservative before they are permanently attached to the frame.
Decking boards are installed perpendicular to the underlying support bearers. Starting along the outer edge furthest from any adjacent structure or wall, the initial board is positioned flush with the outer face of the frame. Appropriate decking screws are driven through the board into each underlying bearer, taking care to sink the fasteners neatly into the textured surface grooves if working with grooved timber.
Maintaining consistent spacing between individual boards is essential for thermal expansion and proper drainage, with recommended gaps ranging from between 3mm and 10mm. Installers often utilize scrap timber off-cuts matching the desired thickness as temporary spacers between consecutive boards. This disciplined spacing is maintained row by row until the decking reaches the final boundary wall or edge.
Because standard dimensions rarely align perfectly with available space, the final board almost always requires custom trimming. After measuring the remaining gap—while factoring in the necessary expansion spacing—the measurement is transferred to a full-size board. Once trimmed to width and treated with wood preservative on the cut edge, the final piece is secured into place with decking screws.
To complete the clean lines of the ground-level deck, fascia boards are attached along all visible outer perimeters to conceal the raw ends of the decking boards and the underlying frame. Typically crafted from square-edged treated timber that matches the rest of the installation, these fascia pieces are screwed directly into the bearers using deck screws. Mitring the corners where the fascia boards meet provides the refined, professional finish that defines a successful weekend woodworking project.