For property owners and builders looking for a fast, efficient, and cost-effective way to line bare masonry, the dot and dab method remains a cornerstone technique in modern construction. Also widely referred to as dry lining or direct bonding, this process involves applying adhesive dabs directly to a brick or block wall and pressing plasterboard firmly onto them. The result is a strong, secure bond between the masonry and the wall lining, making it an enduringly popular choice for both ambitious DIY enthusiasts tackling home renovations and professional tradespeople working under tight schedules.
While the technique is relatively straightforward, achieving a professional standard requires a solid understanding of the materials, preparation steps, and potential pitfalls involved. The process eliminates the need to construct a timber or metal stud framework, which is an alternative dry lining method. Applying plasterboard directly via adhesive often leaves the finished surface feeling more solid and robust than board fixed to a hollow frame. However, because the success of the installation relies entirely on the proper application of the adhesive dots, tradespeople and DIYers alike must approach the project with care to avoid common structural and aesthetic issues.
Like any construction practice, dot and dab comes with its own set of distinct advantages and disadvantages. On the positive side, it is significantly faster than traditional wet plastering and avoids the labour-intensive work associated with building stud walls. This makes it an ideal solution for projects operating on strict timelines. Furthermore, the final wall surface provides a solid feel that many occupants prefer over hollow-backed alternatives.

Conversely, achieving a perfectly flat finish can present a challenge. Because the plasterboard is pressed onto individual adhesive dabs, slight undulations or bumps can sometimes form across the wall if the boards are not properly aligned using a straight edge and spirit level. Additionally, improper adhesive application can create voids that occasionally lead to issues with dampness and condensation over time. Another critical limitation to keep in mind is that dot and dab cannot be used in conjunction with foil-backed plasterboard. The bond between the reflective foil layer and the board itself lacks the necessary structural strength, creating a high risk that the plasterboard will eventually pull away from the adhesive under its own weight.
Before commencing any dry lining work, gathering all the necessary materials is an essential prerequisite. At a minimum, installers need a supply of standard plasterboard, drywall adhesive, measuring tools, a utility knife, a notched trowel or board adhesive trowel, and a mixing paddle. If the masonry wall in question is particularly uneven, bringing a long straight edge to the job site will help ensure the plasterboards are installed evenly across the entire surface.
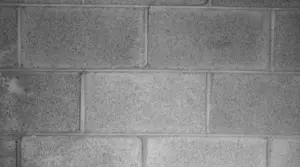
The installation process itself begins with careful preparation of the masonry surface. The bare brick or block wall must be clean, dry, and entirely free of dust, loose mortar, or debris that could compromise the adhesive bond. Many professional tradespeople choose to lightly wet the surface of the masonry before applying the adhesive dots and dabs. This crucial step prevents the dry bricks or blocks from aggressively drawing moisture out of the adhesive, which would otherwise weaken the compound and cause it to fail prematurely. When utilizing this wetting technique, the adhesive must be applied quite quickly, though some builders find that brushing on a diluted PVA and water mixture beforehand offers a more forgiving working time.
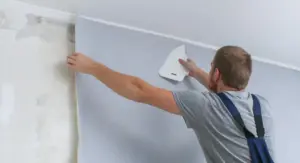
Once the wall is properly prepared, the drywall adhesive is mixed to the correct consistency and applied in vertical rows of dabs along the wall, spacing them out to match the dimensions of the plasterboard. The board is then carefully lifted into position, pressed against the adhesive dabs, and adjusted using a straight edge and mallet to ensure it is completely plumb and flush with neighboring boards. After the adhesive has fully cured, the final stages involve sealing the joints between the individual plasterboards with joint tape and compound, followed by either applying a thin skim coat of finishing plaster or painting directly onto the prepared surface, depending on the desired aesthetic outcome.
While the process is accessible to many people, keeping a few professional tips in mind can dramatically improve the final outcome. Ensuring the adhesive dabs are applied with consistent thickness helps prevent localized bumps, while careful measurement around electrical sockets and window frames prevents costly mistakes.
When comparing dry lining to traditional plastering, several distinct factors emerge. For those without specialized training, traditional plastering is notoriously difficult to master, making dry lining a much more approachable method for home improvers. That being said, traditional wet plastering applied directly to a masonry wall typically results in a harder, more solid surface than plasterboards attached via adhesive dabs. Furthermore, traditional plastering avoids the complication of dealing with an uneven cavity space behind the board when attempting to hang heavy fixtures or shelving on the wall at a later date.
Ultimately, whether choosing to decorate directly over the bare surface of the plasterboards or applying a smooth layer of skim plaster, proper joint treatment remains essential. Filling and taping the seams between the boards prevents cracking and ensures a seamless, professional finish that stands the test of time.