When it comes to interior construction, renovations, and home improvement projects, finding a fast, efficient, and cost-effective way to line a masonry wall is often a primary objective for both property owners and professional tradespeople alike. Among the various techniques available in the modern building industry, the dot and dab method stands out as one of the most popular ways of affixing plasterboard directly to a bare block or brick wall. Also widely referred to as dry lining or direct bonding, this technique has become a staple of contemporary construction due to its ability to transform raw, unfinished masonry into a smooth, ready-to-decorate surface in a fraction of the time required by traditional methods.
However, despite its widespread adoption and apparent simplicity, achieving a successful and enduring installation requires a careful understanding of the correct procedures, underlying materials, and potential pitfalls associated with the process. Industry professionals emphasize that while the technique is accessible to competent DIY enthusiasts, skipping foundational steps or ignoring the physical limitations of the materials can lead to structural compromises, uneven finishes, or long-term moisture issues.
At its core, dot and dab is a method of lining internal walls that involves applying strategically placed adhesive dots, or dabs, directly onto the masonry surface and then firmly pressing plasterboard sheets onto them. This clever approach creates a strong, secure mechanical and chemical bond between the heavy wall and the relatively lightweight plasterboard. Because it bypasses the need to construct a timber or metal stud framework—which is another common method of dry lining a wall—it saves both valuable interior floor space and significant installation time. Furthermore, once properly cured, a dot and dab wall often feels more solid and rigid to the touch than plasterboard applied over an empty framework, eliminating the hollow resonance sometimes associated with stud partitions.
Like any construction technique, however, dot and dab comes with its own distinct set of advantages and disadvantages that must be weighed carefully before any work begins. On the positive side, the speed and ease of fixing plasterboard directly to masonry walls make it an ideal choice for projects operating under tight schedules or strict budgets. Builders can rapidly board out entire rooms, moving swiftly from bare bricks to a uniform surface that is primed for subsequent finishing stages.
Conversely, one of the primary disadvantages of the dot and dab method is the inherent difficulty in achieving a perfectly flat, plumb finish across an entire wall. Because the plasterboard is bedded onto individual adhesive dots, any irregularities in the underlying brickwork or inconsistencies in pressure applied during installation can easily create slight bumps, hollows, or waves in the finished wall surface. Furthermore, building experts warn that if the adhesive is not mixed, positioned, or applied correctly, it can create continuous voids or air gaps that become vulnerable zones for future dampness and mold growth, particularly on exterior-facing masonry walls where thermal bridging or moisture penetration is a risk.
Another crucial technical limitation involves the choice of plasterboard itself. Dot and dab cannot be utilized in conjunction with foil-backed plasterboard. The bonding compound simply lacks the necessary adhesion strength when applied against the metallic foil backing, meaning the heavy plasterboard could easily sheer away from the adhesive over time, posing a safety hazard and ruining the wall structure.

Materials Needed for Dot and Dab Installation
Before beginning any dot and dab installation project, both professionals and DIY practitioners must ensure they have gathered all the necessary materials and equipment on-site. At a bare minimum, the operation requires specialized drywall adhesive, standard plasterboard sheets of the appropriate thickness and fire rating, a measuring tape, a utility knife for cutting boards, a notched trowel or skimming hawk for applying the adhesive, a spirit level to check for vertical and horizontal alignment, and a rubber mallet or straight timber beating lath to tap the boards gently into place.
In scenarios where the masonry wall is particularly uneven, damaged, or poorly constructed, having a long straight edge on hand becomes indispensable. This tool allows the installer to span across multiple adhesive dabs simultaneously, ensuring that adjacent plasterboard sheets are installed correctly, flatly, and evenly without protruding lips or recessed edges that would complicate the later finishing stages.
Step-by-Step Guide to Installing Dot and Dab Walls
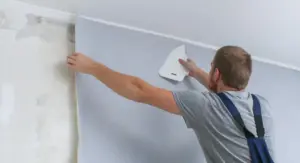
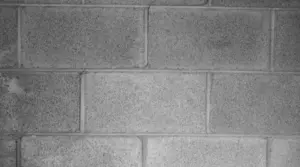
Installing dot and dab walls is a project that almost any dedicated DIY enthusiast can successfully attempt, provided they exercise patience, care, and precision. The process begins with thorough surface preparation, ensuring that the bare brick or block wall is entirely clean, structurally sound, and free from dust, loose mortar, grease, or flaking paint that could compromise the adhesive bond.
Once the wall is prepped and dry, measurements are taken, and the plasterboard sheets are cut to size, accounting for electrical sockets, switches, and natural expansion gaps at the floor and ceiling junctions. The specialized drywall adhesive is then mixed according to the manufacturer’s instructions to achieve a workable, putty-like consistency. Rather than covering the entire back of the board, the adhesive is applied to the masonry wall in evenly spaced vertical rows of individual dabs, typically matching the width and height dimensions of the plasterboard sheet.
Care must be taken to ensure the dabs are thick enough to bridge any minor undulations in the masonry while leaving adequate space for perimeter sealing. The plasterboard sheet is then lifted into position, pressed firmly against the adhesive dabs, and adjusted using a spirit level and a rubber mallet until it is completely plumb and flush with neighboring panels.
Once the adhesive has fully cured and hardened, the installation can be finalized by reinforcing and sealing the recessed joints between the adjacent plasterboards with jointing tape and compound. Following this, the entire assembly can be prepared for decoration, often by applying a smooth layer of skimming plaster across the entire surface to achieve a flawless, professional aesthetic.
Tips for Successful Dot and Dab Plasterboarding
While the dot and dab process is relatively straightforward in theory, adherence to professional best practices helps guarantee a successful, long-lasting installation. Installers should always ensure that electrical back boxes and services are properly extended and secured before the plasterboard is fixed into position, as retrofitting cables behind a direct-bonded wall can prove exceptionally difficult. Additionally, maintaining a small expansion gap of around ten to fifteen millimetres at the floor level prevents moisture from wicking up from the subfloor into the plasterboard, while also accommodating minor building settlements.
Frequently Asked Questions
A common question among those new to dry lining is whether one should wet the wall before applying the dot and dab adhesive. Many experienced professional tradespeople routinely mist or wet the surface of the masonry before applying the adhesive dots and dabs. This practice is designed to prevent the dry, porous blocks or bricks from prematurely sucking the vital moisture out of the adhesive mix, which would otherwise weaken the chemical cure and ruin the bond. However, professionals note that if this method is chosen, the adhesive must be applied quite quickly, and many find that brushing a diluted PVA and water mixture over the masonry beforehand provides a more forgiving and controlled sealing effect.
Another frequent inquiry centers on whether dot and dab is inherently better than traditional wet plastering. For the vast majority of untrained or inexperienced individuals, dry lining via dot and dab is considerably easier and less messy than attempting a full plastering job. That being said, traditional multi-finish plastering applied directly to a solid masonry wall will usually result in a much stronger, more robust finished surface than plasterboards attached via isolated adhesive dots. Furthermore, when plastering directly, homeowners do not need to account for an awkwardly sized internal cavity or void when attempting to hang heavy shelving, televisions, or wall cabinets in the future.
Finally, property owners often wonder whether they can skim over dot and dab walls. The answer is affirmative; once the installation is complete, you can either decorate directly on top of the bare paper face of the plasterboards using specialized primers and paints, or you can apply a traditional skim coat of finishing plaster over the entire wall. In either scenario, industry guidelines strongly recommend that the recessed joints between individual boards are properly taped and filled with joint compound before any final decorative layer is applied, ensuring a seamless finish that resists cracking and movement over time.