When it comes to interior renovation and construction, finding efficient ways to finish masonry walls can make or break a project’s timeline and budget. For builders and property owners looking for a fast and effective solution, the dot and dab method has long remained a staple of modern interior finishing. Also known as dry lining or direct bonding, this technique offers one of the quickest and most cost-effective ways to affix plasterboard directly to bare block or brick walls.
The process involves applying strategic dabs and dots of specially formulated drywall adhesive directly onto a masonry surface and then pressing sheets of plasterboard firmly into place. This creates a strong, secure, and permanent bond between the rough wall and the smooth plasterboard. Because of its balance of speed and reliability, the technique has earned widespread popularity among both professional builders managing commercial timelines and DIY enthusiasts tackling home improvements over a weekend. However, while the process is relatively straightforward, achieving a professional standard requires a thorough understanding of the method’s mechanics, material limitations, and installation nuances.
Pros and Cons of the Dot and Dab Method
Like any construction technique, dot and dab comes with a specific set of distinct advantages and disadvantages that must be weighed before starting a project. On the positive side, the primary appeal of direct bonding is its unmatched speed and simplicity. Traditional dry-lining often requires constructing a time-consuming timber or metal stud framework to hold the plasterboard. Dot and dab bypasses this step entirely, saving substantial labour hours and material costs. Furthermore, once the plasterboard is cured against the masonry, the finished surface often feels more solid and rigid to the touch than plasterboard mounted over a hollow framework.
Conversely, the method presents certain technical challenges. Achieving a perfectly flat and plumb surface can prove difficult for inexperienced installers, as uneven application of the adhesive dots can create subtle undulations or bumps across the wall face. Moreover, poor adhesive application—such as leaving continuous gaps or voids—can inadvertently create cold spots that lead to moisture accumulation, dampness, and mould growth over the life of the building.
Another critical limitation involves material compatibility. The dot and dab method cannot be used in conjunction with foil-backed plasterboard. The adhesive bond simply fails to adhere securely to the metallic foil backing, creating a significant risk that the heavy plasterboard panels could eventually pull away from the wall under their own weight. Understanding these trade-offs is essential for anyone aiming to achieve a durable, high-quality interior finish.

Materials Needed for Dot and Dab Installation
Preparation is a critical phase of any construction project, and dry lining is no exception. Before commencing a dot and dab installation, workers must ensure they have all the necessary materials and safety gear assembled on-site. At a bare minimum, the project requires drywall adhesive, standard plasterboard sheets, a mixing bucket, a plasterer’s trowel, a paddle mixer, and a spirit level to check for vertical alignment.
For walls that exhibit significant structural irregularities or uneven surfaces, incorporating a long straight edge into the toolkit becomes invaluable. This tool allows the installer to span across multiple adhesive dabs, ensuring that entire sections of plasterboard are pressed uniformly to the correct plane before the adhesive sets. Having the proper equipment on hand prevents costly mid-project delays and helps maintain a steady workflow from the initial mixing stage to the final board placement.
Step-by-Step Guide to Installing Dot and Dab Walls
While dry lining with direct bonding is accessible to those undertaking home renovations, executing the process correctly dictates the final quality of the room. The installation begins with thorough surface preparation. The masonry wall must be structurally sound, clean, and entirely free of dust, loose debris, or oil that could compromise the adhesive bond. Any existing flaking paint or loose mortar should be scraped away before work proceeds.
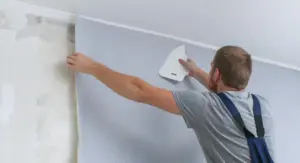
Once the surface is prepared, the drywall adhesive is mixed according to the manufacturer’s instructions until it reaches a smooth, workable consistency. Instead of covering the entire back of the plasterboard, the adhesive is applied in vertical strips of dabs—typically spaced to align with the edges and center of the plasterboard sheet. These dabs must be thick enough to accommodate any minor variations in the masonry while providing maximum surface contact once compressed.
The plasterboard is then lifted into position, starting from the floor and working upward. Installers press the board firmly against the adhesive dabs, using a long spirit level and a straight edge to tap the board gently until it aligns perfectly plumb and level with adjacent panels. It is vital to leave a small expansion gap at the floor level to prevent rising moisture from transferring directly into the gypsum board.
Once the adhesive has fully cured and the boards are securely locked in place, the finishing stages can begin. Installers typically reinforce the joints between individual plasterboard panels using joint tape and compound, creating a seamless surface. From there, the entire wall can either be decorated directly or finished with a thin skim coat of plaster to achieve a completely smooth, paint-ready texture.
Tips for Successful Dot and Dab Plasterboarding
Executing a flawless dot and dab installation relies as much on professional technique as it does on following basic instructions. One of the most common pitfalls during installation is failing to maintain consistent pressure across the board, which can result in a wavy or uneven wall surface. Installers should regularly check their progress with a spirit level across multiple planes rather than relying solely on visual estimation. Additionally, managing the open time of the adhesive is crucial; mixing large batches that begin to set before the boards are positioned can lead to a weak and compromised bond. Environmental conditions on-site, such as extreme heat or high humidity, should also be factored in, as they directly impact how quickly the adhesive cures.
Frequently Asked Questions
A common question among those new to dry lining is whether the masonry wall should be wetted before applying the adhesive. Many professional tradespeople choose to dampen the surface of the bricks or blocks prior to application. This technique prevents the dry masonry from rapidly drawing moisture out of the adhesive, which can otherwise cause the mixture to set prematurely and weaken the bond. However, when utilizing this approach, the adhesive must be applied swiftly, and many workers find that brushing a diluted PVA and water mixture over the wall offers a more forgiving and reliable alternative.
Another frequent debate centers on whether dot and dab is superior to traditional wet plastering. For individuals without professional training, wet plastering is notoriously difficult to execute to a high standard, making dry lining a much more approachable alternative for property renovators. That said, traditional plastering directly onto a solid masonry wall generally yields a harder, more robust surface than plasterboard fixed with adhesive dots. Furthermore, solid plastering eliminates the hollow cavities inherent in dry-lined walls, which can sometimes complicate the process of hanging heavy wall fixtures or shelving in the future.
Finally, property owners often wonder whether dot and dab walls can be successfully skimmed with finishing plaster. The answer is affirmative; once the plasterboard is secured and the joints are properly taped and filled with joint compound, the surface can either be painted directly or finished with a skim coat of plaster. Both approaches yield a clean, modern interior wall, provided the foundational steps of the installation were executed with precision and care.