When property owners and builders look for a fast, efficient way to line a masonry wall, dot and dab frequently emerges as the primary solution. As one of the most cost-effective and rapid methods for affixing plasterboard directly to bare block or brick, dry lining has carved out an essential place in modern construction and renovation projects. However, achieving a successful installation requires an understanding of both the method’s benefits and its inherent limitations.
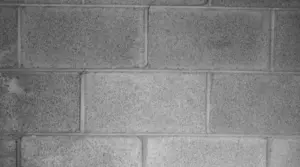
Also known as direct bonding, dot and dab is a widely utilized technique for finishing internal walls. The process involves applying strategic dabs of specially formulated drywall adhesive directly onto a masonry surface and then pressing sheets of plasterboard firmly into place. This creates a secure, structural bond between the raw wall and the interior board. Because it bypasses the need to construct a traditional timber or metal stud framework, the technique has become a staple for both professional contractors managing tight construction schedules and DIY enthusiasts tackling home renovations.
Despite its popularity and relative simplicity, industry specialists emphasize that understanding the nuances of the dot and dab method is critical for achieving a professional, long-lasting finish. Like any construction technique, it comes with a distinct set of operational advantages and disadvantages that must be weighed carefully before starting any project.
Pros and Cons of the Dot and Dab Method
The primary appeal of the dot and dab method lies in its speed and efficiency. Fixing plasterboard directly to masonry walls saves considerable time, making it an attractive option for projects operating under strict deadlines. Builders eliminate the labor-intensive step of building a stud framework, which is required in alternative dry lining methods. Furthermore, once the adhesive sets, the finished surface often feels more solid and rigid under impact compared to plasterboard mounted over an open timber frame.
Conversely, achieving a perfectly flat finish can present a challenge. Because the plasterboard is bedded onto individual adhesive dots, minor inconsistencies in pressure or wall alignment can create subtle bumps or undulations across the finished wall surface. Moreover, improper adhesive application can introduce serious risks down the line, particularly concerning dampness and mould growth if moisture bridges the gap between the masonry and the board.

A critical technical limitation of the method involves the choice of materials. Dot and dab is entirely incompatible with foil-backed plasterboard. The bonding compound fails to establish a sufficiently strong adhesion to the foil layer, creating a significant risk that the heavy plasterboard could eventually detach from the wall under its own weight.
Materials Needed for Dot and Dab Installation
Preparation is key to any successful construction task, and direct bonding is no exception. Before commencing an installation, contractors and builders must gather the appropriate materials and equipment. At a minimum, the inventory requires suitable plasterboard sheets, drywall adhesive, measuring tools, a mixing paddle, a bucket for preparing the compound, and a reliable spirit level to check for vertical alignment. When dealing with masonry surfaces that feature substantial undulations or irregularities, utilizing a long straight edge becomes indispensable for ensuring that the plasterboard is installed evenly across the entire elevation.
Step-by-Step Guide to Installing Dot and Dab Walls
While dry lining with the dot and dab technique is a project that resourceful individuals can attempt, achieving professional results requires careful attention to detail and a methodical approach. The installation generally begins with thorough surface preparation, ensuring the masonry is clean, structurally sound, and free of dust or loose debris that might compromise the adhesive bond.
Once the wall is prepared, the drywall adhesive is mixed according to the manufacturer’s specifications to achieve a workable, consistent paste. The adhesive is then applied to the wall in vertical rows of evenly spaced dabs, ensuring there is enough coverage to support the plasterboard securely while leaving enough space for air circulation and minor adjustments.
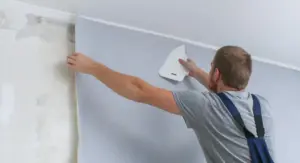
The plasterboard sheet is then lifted into position, pressed firmly against the adhesive dabs, and adjusted using a spirit level and straight edge to ensure it sits plumb and flush with neighboring boards. After the adhesive has fully cured, the final stages involve sealing the joints between the individual plasterboards with joint tape and compound, followed by applying a finishing skim coat of plaster to create a smooth, paint-ready surface.
Tips for Successful Dot and Dab Plasterboarding
Although the mechanics of dot and dab are straightforward, experienced builders adhere to specific best practices to guarantee structural integrity. Ensuring that the adhesive dabs are properly sized and positioned prevents hollow spots behind the board, which can compromise the wall’s impact resistance. Environmental factors, such as ambient temperature and humidity on the construction site, must also be monitored, as they directly influence the curing time of the gypsum-based adhesive.
Frequently Asked Questions
Should You Wet the Wall Before Dot and Dab?
Many professional tradespeople adopt the practice of dampening the masonry surface before applying the adhesive dots and dabs. Dry blocks or bricks possess high suction rates, meaning they can rapidly draw essential moisture out of the wet adhesive before it has time to cure properly. While wetting the wall mitigates this issue, it requires the adhesive to be applied quickly; consequently, some builders prefer using a diluted PVA and water mixture, which offers a more forgiving working window.
Is Dot and Dab Better Than Plastering?
For those without professional training, traditional wet plastering is notoriously difficult to execute to a high standard, making dry lining a more accessible alternative. However, traditional plastering directly onto a masonry wall generally results in a denser, stronger surface than mounting plasterboards via adhesive dabs. Additionally, direct plastering avoids the complication of dealing with an awkward, hollow cavity when fixing heavy shelving or fixtures to the wall in the future.
Can You Skim Over Dot and Dab Walls?
Property owners can choose to decorate directly onto the raw face of the installed plasterboards or apply a traditional layer of skim plaster for a completely seamless finish. Regardless of the chosen decorative finish, industry standards recommend filling and taping the joints between adjacent boards with a specialized joint compound beforehand to prevent future cracking along the seams.