For homeowners looking to refresh a tired interior, painting directly over existing wallpaper can often seem like an appealing shortcut. Avoiding the tedious, messy, and time-consuming process of stripping old paper, preparing bare plaster, and starting from scratch is a major draw for weekend renovators and professional decorators alike. However, as interior specialists and painting experts point out, taking this route requires careful evaluation, meticulous preparation, and an understanding of the potential pitfalls that can ruin an otherwise straightforward room transformation.
Before picking up a roller or purchasing gallons of topcoat, property owners must thoroughly assess the current state of their walls. The fundamental rule of painting over wallpaper is that the underlying surface must be entirely stable and in good structural condition. If the wallpaper is old, heavily damaged, or suffering from significant rips and tears, attempting to paint over it is rarely a viable option. In cases where the paper is already compromised, the wisest course of action remains stripping it away entirely to paint the bare wall underneath.
Furthermore, painting over wallpaper that is actively peeling in multiple areas is strongly discouraged by trade professionals. When wallpaper begins to separate from the wall in several spots, it usually signals a deeper failure of the adhesive paste. This breakdown can stem from the use of low-quality glue during the initial installation or could be an indicator of lingering dampness within the room. While localized peeling—such as a single loose corner—can sometimes be carefully re-anchored using specialized wallpaper paste, allowed to dry completely, and smoothed down to prevent air bubbles, widespread lifting means the wall is simply not ready to receive a fresh coat of paint.

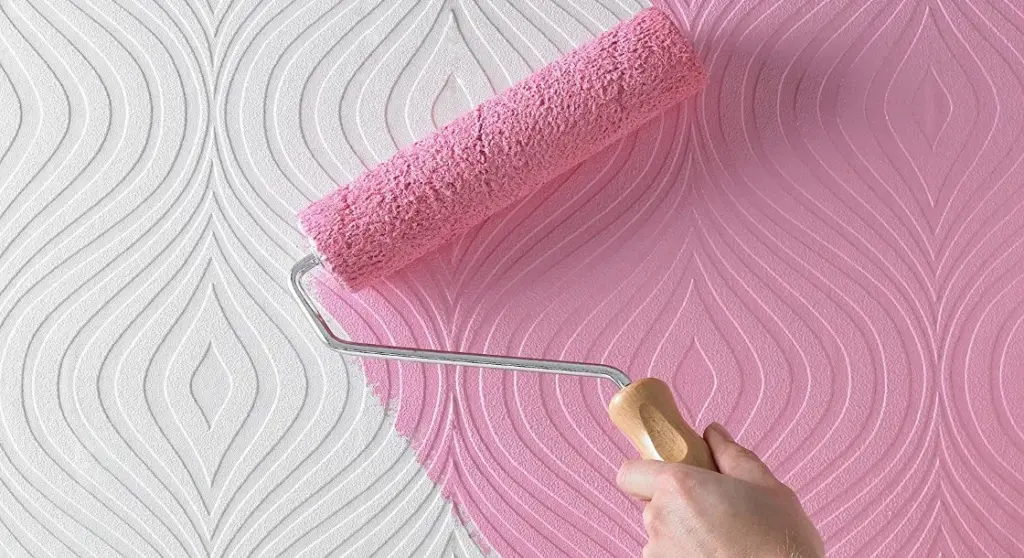
When it comes to the style of the paper, plain and flat designs present the most straightforward canvas for a new paint job. Nevertheless, it is entirely possible to paint over textured or patterned wallpaper, provided the homeowner is comfortable with the underlying relief or pattern remaining visible through the new finish. The texture will not disappear simply because a coat of paint has been applied, meaning any embossed designs or patterns will become a permanent part of the room’s new aesthetic texture.
Once the wallpaper has been inspected and deemed a suitable candidate for painting, the scope of preliminary work shifts to surface preparation. Assuming the paper is clean, dry, and firmly adhered, the preparatory phase is relatively straightforward compared to traditional wall stripping, though it still demands attention to detail to ensure clean lines and a professional final appearance.
Crucially, experts advise that priming the surface should never be skipped, regardless of whether the wallpaper is light-colored or unpatterned. Applying at least one coat of a quality primer plays a vital role in achieving a smooth, professional finish when the topcoat is eventually applied, while also sealing the paper so it is easier to cover evenly.
A critical technical consideration during this phase involves the choice of primer. Standard water-based primers can sometimes penetrate too deeply into the wallpaper, introducing excess moisture that can reactivate or compromise the underlying paste and cause the paper to bubble or detach. To mitigate this risk, professionals generally recommend utilizing an oil-based primer or a specialized all-in-one sealer designed specifically for difficult substrates. Applying one to two coats of such a primer, and allowing it adequate time to cure completely, creates a stable barrier for the subsequent layers of paint.

With the priming stage successfully completed, decorators can select their desired topcoat color and proceed with painting the walls. Yet, even with careful planning and execution, certain structural issues inherent to wallpaper can emerge during or after the painting process.
One common complication arises from the natural behavior of wallpaper as it dries and ages. If wallpaper strips were not tightly butt-jointed during installation, or if the paper shrank slightly as the original paste dried, thin gaps can occasionally appear between adjacent sheets. While discovering these gaps after deciding to paint can be frustrating, it does not spell disaster for the project, provided the surrounding wallpaper remains firmly affixed to the wall.
Addressing these gaps requires a deliberate, step-by-step approach that is best executed after the primer has been applied. Once the primer has set completely, fine interior filler can be carefully worked into the gaps between the sheets to create a flush surface. Because any raised filler will stand out starkly and look unsightly once painted over, the filled areas must be meticulously sanded down until they are perfectly level with the surrounding paper. Taking the extra time to achieve a smooth, uniform transition ensures that the final coats of paint will conceal the imperfections seamlessly, leaving a polished and professional finish across the entire room.