For homeowners seeking a fresh aesthetic without the labor-intensive ordeal of stripping old layers, painting directly over existing wallpaper has long presented an appealing shortcut. Bypassing the grueling process of scraping paper, soaking adhesives, and preparing bare plaster can save substantial time during a room revamp. However, home improvement experts and interior specialists emphasize that this method is far from a universal fix. Achieving a professional, lasting finish requires a careful evaluation of the wall’s current state, an understanding of potential pitfalls, and strict adherence to proper priming and preparation techniques.
Before committing to a paintbrush, property owners must thoroughly inspect the integrity of the underlying wallpaper. The primary prerequisite for a successful paint job is that the paper remains in good condition, completely free from major rips, tears, or structural damage. When wallpaper is extensively compromised, attempting to mask the damage with paint typically results in a substandard appearance that accentuates rather than hides the flaws. In such cases, stripping the compromised material and treating the bare wall underneath remains the recommended course of action.
Furthermore, decorators advise against painting over wallpaper that is actively peeling across multiple sections. Even if the paper lacks visible tears, widespread peeling indicates that the underlying adhesive paste is failing. This failure is frequently triggered by two main factors: either the original installation utilized poor-quality paste, or moisture within the room has gradually compromised the bond. While isolated peeling limited to a single corner or seam can often be remedied by carefully re-securing the loose edge with fresh wallpaper paste—ensuring no air bubbles are trapped and allowing it to dry entirely before painting—widespread adhesion failure signals a deeper problem that paint alone cannot resolve.
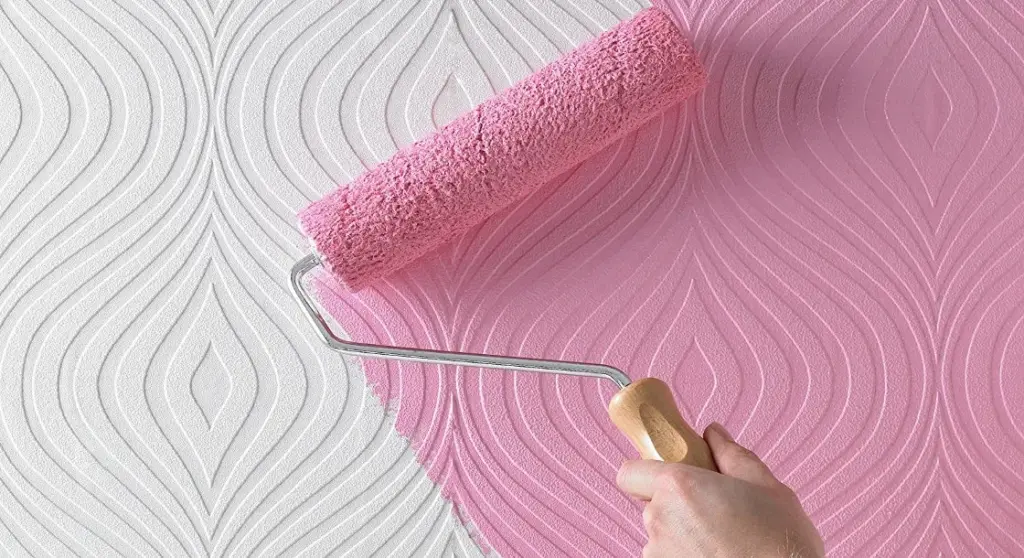
Regarding aesthetics, plain and flat wallpaper offers the most seamless canvas for a new coat of color. Nevertheless, textured and patterned styles can also be painted over, provided the homeowner is comfortable with the underlying relief or pattern remaining visible beneath the fresh pigment.

Preparing Wallpaper for Painting
Assuming a thorough inspection confirms that the wallpaper is structurally sound, clean, and securely adhered, the preliminary preparation required before applying color is relatively straightforward compared to traditional wall stripping. The focus shifts from heavy removal to surface stabilization and meticulous cleaning to ensure the room is ready for the upcoming transformation. This phase typically involves clearing the space, protecting surrounding fixtures with decorator’s masking tape, and ensuring the surface is entirely free of dust and household grime that could interfere with the adherence of subsequent layers.
Priming Wallpaper for Painting
Even when dealing with light-coloured or unpatterned wallpaper, professionals strongly recommend applying at least one foundational coat of primer. A quality primer creates a uniform barrier, helping the chosen topcoat achieve a clean, opaque finish while making the underlying paper significantly easier to cover with fewer coats of paint.
A critical technical consideration during this phase involves the choice of primer formulation. Water-based primers carry the distinct risk of soaking too deeply into the wallpaper, potentially reactivating or breaking down the old paste underneath and causing the paper to bubble or lift. To circumvent this risk, experts routinely advise using an oil-based primer or a specialized sealing product, such as a dedicated all-in-one primer and sealer, designed specifically to prep challenging surfaces for painting. Applying one to two thorough coats of an appropriate sealer, and allowing it to cure completely, lays the necessary groundwork for a durable finish.
How to Paint Over Wallpaper
With the priming stage successfully completed and thoroughly dried, homeowners can proceed to select their preferred topcoat color and finish. The application of the final paint layers follows standard interior painting methodologies, utilizing a combination of brushes for edges and corners alongside rollers for broader wall surfaces. Ensuring each coat dries completely before subsequent applications prevents bubbling, sagging, or uneven texture distribution across the newly revamped room.

Problems With Painting on Top of Wallpaper
While careful planning and meticulous preparation generally yield a successful result, painting directly over wallpaper can occasionally present distinct challenges. Fortunately, most of these complications can be effectively managed or resolved with targeted corrective work.
One common issue arises from the natural behavior of wallpaper as it dries and ages on the wall. If wallpaper strips were hung tightly together initially, gaps are rarely an issue; however, slight shrinkage over time can occasionally leave thin seams visible between the sheets. While this minor separation does not ruin the overarching plan to paint, it does require deliberate intervention before the project is completed.
Assuming the wallpaper itself remains firmly anchored to the wall, standard wall filler can be deployed to bridge and conceal the gaps between the sheets. Professionals advise performing this corrective step after the primer has been applied and allowed to set, rather than before. Once the filler is applied over the primed gap, it must be carefully sanded back until it matches the exact level of the surrounding paper surface. Because any raised filler will stand out prominently once the final colored topcoat is rolled over it, taking adequate time to achieve a smooth, flush finish is essential to the overall visual success of the room’s transformation.