For homeowners looking to refresh an interior space quickly, opting to paint directly over existing wallpaper has long presented an appealing shortcut. Rather than enduring the labor-intensive process of stripping old paper, preparing crumbly plaster, and applying a base coat to bare walls, slapping a fresh layer of paint over the top can seem like a streamlined solution. However, industry professionals and seasoned renovators emphasize that this technique requires careful evaluation of the existing wall conditions to avoid costly and unsightly mistakes down the line.
Before deciding to pick up a roller, several critical factors must be assessed. The foundational rule of this renovation shortcut is that the underlying wallpaper must be in sound condition, entirely free from rips, tears, or structural damage. If the paper is already compromised, attempting to paint over it is rarely successful. In such instances, the underlying issues will only be magnified by moisture and weight from the paint, making a full removal process the safer, more durable choice.
Condition issues extend beyond visible damage to the integrity of the adhesive itself. Painting over wallpaper that is peeling in multiple locations is strongly discouraged by decorating experts. When wallpaper begins to peel independently of physical trauma, it usually indicates that the wallpaper paste has failed. This failure can stem from using low-quality adhesive during the original installation or, more frequently, from moisture seeping through the walls due to dampness within the room. Applying heavy liquid paint to failing adhesive will only accelerate the detachment process, causing the paper to bubble, sag, and detach completely from the wall substrate.
Nevertheless, not all minor imperfections require abandoning the project entirely. If peeling is localized to a single, isolated area, homeowners can often salvage the situation by carefully re-securing the loose section using dedicated wallpaper paste. This repair must be executed meticulously, ensuring that air bubbles are smoothed out completely. Crucially, the patched area must be allowed to dry thoroughly before any painting commences.

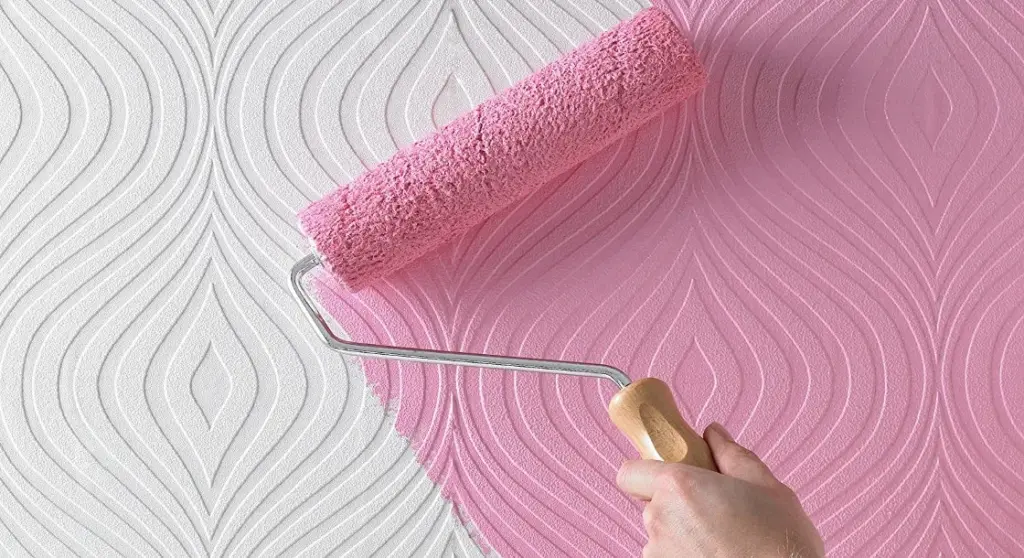
When considering the type of paper, flat and plain varieties remain the most suitable candidates for a direct paint application. Textured and patterned papers can still be painted over, but decorators must accept that the underlying relief, whether it is an embossed damask or a heavy woodchip design, will remain clearly visible beneath the new color scheme.
Preparing Wallpaper for Painting
Assuming a thorough inspection reveals that the wallpaper is structurally sound, firmly adhered, and ready for an aesthetic update, the actual preparation phase remains relatively straightforward. Because the foundational layer of paper replaces the need for skim-coating or extensive wall patching on bare plaster, the preparatory steps focus primarily on cleaning the surface, protecting surrounding fixtures, and establishing a clean workspace.
With the room properly prepared and protected, the focus shifts directly to priming the surface. Even when dealing with light-colored or unpatterned wallpaper, applying at least one coat of primer is universally recommended by trade professionals. Priming ensures that the topcoat achieves a uniform, clean finish and helps seal the surface so that the paper absorbs the subsequent layers of paint evenly.
However, the choice of primer is of paramount importance. Water-based primers can penetrate too deeply through the wallpaper surface, potentially re-wetting the old paste beneath and compromising its adhesive strength. To prevent this, experts strongly advise using an oil-based primer or a specialized sealer specifically engineered to lock down surfaces without destabilizing underlying adhesives. Products such as all-in-one oil-based primers and sealers provide a reliable barrier for preparing wallpaper. Decorators should apply at least one, and ideally two, thorough coats of this specialized primer, allowing it to cure completely before moving forward with the topcoat.

How to Paint Over Wallpaper
Once the primer has dried completely and created a stable, sealed foundation, homeowners can select their preferred topcoat paint color and begin the transformation of the room. The actual application mirrors standard wall painting techniques, relying on quality rollers and brushes to achieve an even distribution of color across the primed surface. Working methodically from top to bottom ensures that any drips or roller marks are caught and corrected immediately before the paint begins to set.
Problems With Painting on Top of Wallpaper
While planning and executing the process correctly generally yields a successful room refresh, certain complications can still arise over time. Fortunately, most of these potential issues can be effectively avoided or remedied with a modest amount of targeted remedial work.
One common issue involves the appearance of gaps between individual wallpaper strips. When wallpaper is originally hung, strips are typically butted closely together. However, as the paper dries and settles following installation, it can occasionally shrink slightly, leaving thin vertical gaps between the sheets. While this shrinkage is an annoyance, it does not spell disaster for a painting project, provided it is addressed properly.
Assuming the wallpaper is otherwise firmly affixed to the wall, a standard interior filler can be employed to bridge and conceal the gaps between the sheets. To achieve a seamless look, this filling process should ideally take place after the primer has been applied. Once the filler has set completely, it must be sanded back painstakingly until it is entirely flush with the surrounding paper surface. Because any raised filler will catch the light and show up prominently once the final paint color is applied, taking the necessary time to sand the area smooth is essential for a professional finish.