When it comes to refreshing the look and feel of a residential interior, homeowners and property renovators constantly seek methods that balance aesthetic appeal with time and labor efficiency. Among the various interior update techniques, painting directly over existing wallpaper has re-emerged as a popular topic of discussion within the home improvement sector. Choosing this approach can often provide a much quicker route to modernizing a room compared to the traditionally arduous process of stripping old paper, repairing the bare plaster underneath, and subsequently preparing the walls for a fresh coat of paint. However, industry experts emphasize that while skipping the removal stage saves considerable time, it introduces a unique set of variables and potential pitfalls that must be carefully evaluated before any painting supplies are unsealed.
The viability of painting over wallpaper largely depends on the current state of the walls in question. Before committing to the project, property owners are advised to conduct a thorough inspection to ensure the underlying paper is structurally sound, clean, and entirely free from rips, tears, or significant damage. If the existing wallpaper is found to be in poor condition, professionals generally recommend abandoning the shortcut and undertaking the full stripping process to achieve a durable, high-quality finish on the bare wall.
A critical factor in this preliminary assessment is the adherence of the wallpaper to the wall surface. Painting over wallpaper that is already peeling in multiple areas is strongly discouraged, regardless of whether the paper itself is torn. Widespread peeling typically indicates that the original adhesive paste is failing, a deterioration that can stem from the use of inferior paste during the initial installation or long-term compromise caused by moisture and dampness within the room. If moisture is the underlying culprit, simply sealing over the paper with paint will trap the dampness, potentially leading to greater structural and aesthetic issues down the line.
Conversely, if peeling is minimal and localized to a single, isolated spot, it is often possible to remedy the issue by re-securing the loose edge with standard wallpaper paste prior to painting. When undertaking localized repairs, specialists stress the importance of careful application to prevent the formation of trapped air bubbles beneath the paper, followed by allowing adequate time for the paste to dry completely before any paint touches the surface.

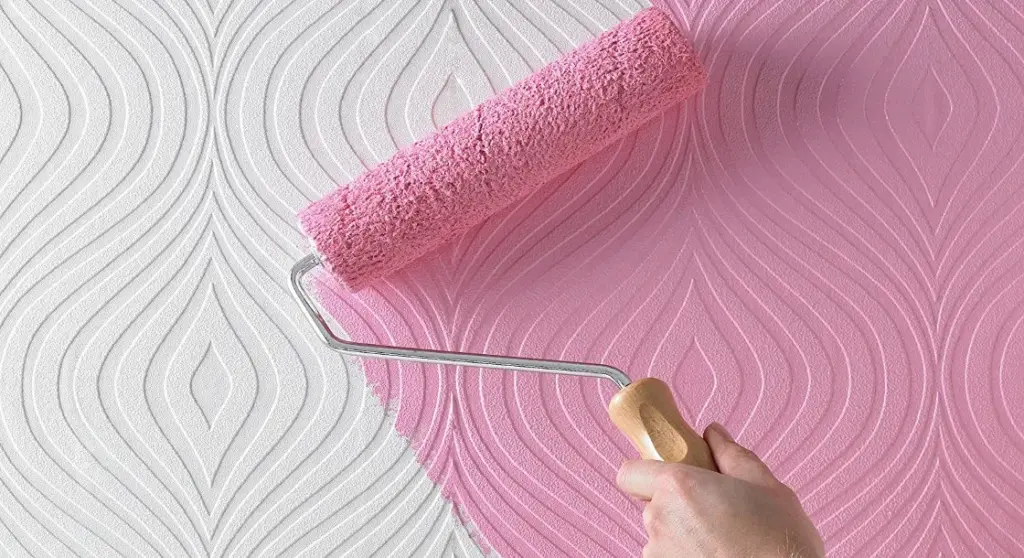
Beyond structural integrity, the physical characteristics of the wallpaper play a significant role in the final outcome. Plain, flat wallpapers provide the most seamless canvas for a fresh coat of paint, yielding a smooth and uniform appearance. Nevertheless, property owners can successfully paint over textured and patterned wallpapers as well, provided they are willing to accept that the underlying texture or faint pattern contours will remain visible through the finished paint layers.
Assuming the preliminary inspection confirms that the wallpaper is in good condition, the necessary preparation phase becomes relatively straightforward compared to traditional wall stripping. The focus shifts quickly from demolition to surface conditioning, setting the stage for the application of primers and topcoats.
Preparing Wallpaper for Painting
Even when dealing with light-coloured or unpatterned wallpaper, industry guidelines strongly advise applying at least one coat of a dedicated primer before introducing the final colour. Priming serves a vital function in this process, ensuring a clean, uniform finish when the topcoat is eventually rolled on while making the underlying paper significantly easier to cover evenly.
A crucial technical consideration during this stage involves the choice of primer formulation. Water-based primers carry the distinct risk of soaking too deeply into the wallpaper, potentially reactivating or weakening the underlying paste and causing the paper to bubble or detach from the wall. To circumvent this risk, painting professionals universally recommend selecting an oil-based primer or a specialized sealing product specifically designed for surface preparation over wallpaper. These formulations create a stable barrier that seals the paper without compromising the adhesive bonds beneath. Applying one to two coats of a reliable primer—such as an all-in-one primer and sealer—and allowing it to cure completely establishes a dependable foundation for the chosen topcoat.

How to Paint Over Wallpaper
Once the primer has fully cured, renovators can proceed to select their preferred topcoat paint colour and finish to begin transforming the space. The application process mirrors standard wall painting techniques, relying on rollers and brushes to distribute the paint evenly across the primed surface. However, the success of this phase remains tethered to the meticulousness of the preceding preparation and priming steps.
Problems With Painting on Top of Wallpaper
While careful planning and correct execution make painting over wallpaper a viable and efficient strategy, certain complications can still arise during or after the project. Fortunately, most of these potential issues can be successfully managed or avoided with a modest amount of remedial work.
Gaps Between Wallpaper Strips
One of the more common challenges encountered when painting over older wallpaper installations is the appearance of gaps between adjacent strips of paper. When wallpaper is originally hung, the strips are often tightly abutted. However, as the paste dries and the paper ages, minor shrinkage can occur, resulting in thin gaps or seams appearing along the wall. While this natural shifting is not an insurmountable obstacle for a paint-over project, it cannot be ignored if a professional finish is desired.
Assuming the wallpaper is otherwise secure and firmly affixed to the substrate, these gaps can be successfully concealed using standard wall filler. Industry experts note that the ideal time to address these seams is after the primer coats have been applied. Once the primer has fully set, the filler can be applied to the gaps and carefully sanded back until it is entirely flush with the level of the surrounding paper. Because any raised filler will stand out prominently once painted over, taking the necessary time to sand the repaired areas smoothly is essential for achieving a polished and professional result in the newly revamped room.