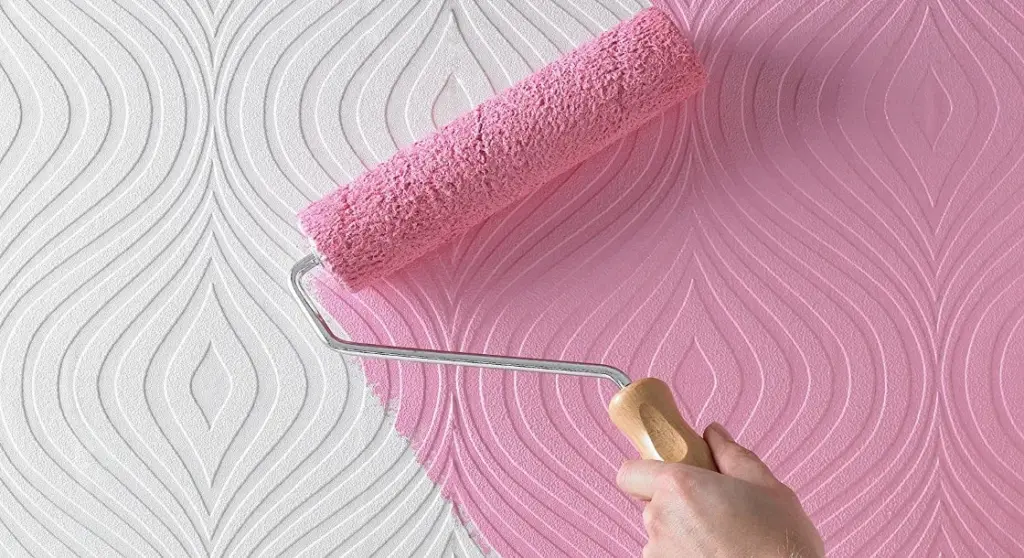
Choosing to paint over existing wallpaper is frequently viewed by homeowners and interior decorators as a much quicker way to completely revamp a living space, especially when compared to the laborious and time-consuming process of stripping old paper, preparing bare walls, and applying fresh coats. However, taking this shortcut requires careful consideration of several crucial factors. Industry experts and experienced decorators emphasize that while painting directly onto wallpaper can save valuable time, it also comes with a series of potential pitfalls that must be avoided to ensure a lasting and professional-looking finish.
Before making the final decision to bypass the stripping phase, homeowners must thoroughly evaluate the current condition of the wallpaper in question. The primary prerequisite for a successful paint job is that the paper must be in good overall condition, remaining entirely free from major rips, tears, or structural damage. If the existing wallpaper is already in poor condition, attempting to paint over it is rarely a viable solution. In such cases, professionals generally advise that it is much better to take the time to strip the damaged material entirely and paint the exposed bare wall underneath, ensuring a smooth and stable foundation for the new color.
Furthermore, painting over wallpaper that is already peeling in multiple locations is strongly discouraged, even if the paper itself has not suffered any tears. When wallpaper begins to peel across various sections of a room, it typically indicates that the underlying adhesive paste is starting to fail. This loss of adhesion can stem from several underlying issues, such as the use of substandard paste during the original installation or moisture damage compromising the bond over time. Applying wet paint to compromised, lifting wallpaper will only accelerate the failure, pulling the old layers away from the wall completely.
However, if the peeling is strictly localized to a single, isolated area, remedying the issue before reaching for a paintbrush may be entirely feasible. Homeowners can often re-stick isolated lifting edges using a small amount of fresh wallpaper paste. When undertaking this minor repair, it must be executed carefully to prevent unsightly air bubbles from forming beneath the surface. It is also critical to allow the repaired section to dry completely before any primers or topcoats are introduced to the area.
Regarding the aesthetic suitability of different wallpaper types, plain and flat designs serve as the most straightforward surfaces for painting. Yet, textured and patterned papers can still be painted over successfully, provided the homeowner is comfortable with the underlying texture remaining fully visible through the new coats of paint. This physical texture can actually add a unique depth and character to a room, though it requires specific attention during the painting phase to ensure complete and even coverage across all ridges and grooves.

Preparing Wallpaper for Painting
Assuming an inspection confirms that the existing wallpaper is securely adhered and in sound overall condition, the required preparation work before painting is comparatively minimal. With the room adequately cleared and protected, the transition to applying the primary layers can begin smoothly.
Priming Wallpaper for Painting
Even when dealing with light-colored or completely unpatterned wallpaper, applying at least one coat of primer is strongly recommended by professionals. A proper primer layer helps achieve a clean, uniform finish when the final topcoat is applied, while simultaneously making the underlying paper much easier to cover fully.
A critical technical consideration during this stage involves the choice of primer. Water-based primers can sometimes soak too deeply into the wallpaper material, potentially reactivating or weakening the underlying adhesive paste. Consequently, industry standards suggest utilizing an oil-based primer whenever painting over wallpaper to protect the integrity of the wall structure. Specialized all-in-one primers and sealers, such as those formulated by brands like Zinsser, are frequently selected by decorators to effectively prepare wallpapered surfaces for a fresh coat of paint. Homeowners are generally advised to apply at least one, but ideally two, thorough coats of primer, ensuring each layer dries completely before moving forward with the main painting process.
How to Paint Over Wallpaper

Once the primer has cured entirely, homeowners can select their preferred topcoat paint color and begin the transformation of their wallpapered walls. The application follows standard painting techniques, though care must be taken not to overload the surface with excessive moisture, which could still impact the old wallpaper adhesive if the primer barrier is inadequate.
Problems With Painting on Top of Wallpaper
While careful planning and meticulous preparation usually allow for a smooth painting process over wallpaper, certain complications can still occasionally arise. Fortunately, most of these common issues can be successfully avoided or resolved with a modest amount of additional remedial work.
Gaps Between Wallpaper Strips
When wallpaper is originally installed with high precision, gaps between individual strips should not present an issue. Nevertheless, as wallpaper ages and dries completely following its initial application, it can occasionally shrink by microscopic margins, resulting in thin, noticeable gaps between the sheets. While this occurrence is not a complete disaster for a room redesign, it does require deliberate attention before the project is finished.
Assuming the rest of the wallpaper is structurally sound and firmly affixed to the wall, standard decorator’s filler can be employed to effectively disguise these narrow gaps between sheets. Professionals recommend performing this gap-filling step only after the initial coats of primer have been applied and fully cured. Once the filler has set inside the gaps, it must be carefully sanded down until it is perfectly level with the surrounding paper surface. Because any raised filler will stand out severely and create an unprofessional appearance once the topcoat is applied, taking the necessary time to sand the area down smoothly is an essential part of the process.