For homeowners looking to revitalize a tired room without undertaking the arduous, time-consuming process of stripping old wallpaper, preparing bare walls, and starting from scratch, painting directly over existing wallpaper has long presented an appealing alternative. This shortcut can drastically cut down on project timelines and labor intensity, offering a fresh aesthetic with a fraction of the traditional effort. However, painting over wallpaper is not a universal solution, and interior design and renovation experts emphasize that success relies heavily on meticulous inspection, proper material selection, and an understanding of potential structural pitfalls that can ruin a finished space if ignored.
Before committing to the brush and roller, property owners must conduct a thorough assessment of the walls in question. The primary prerequisite for painting over wallpaper is that the underlying material must be in sound condition, entirely free from rips, tears, and widespread surface damage. If the paper exhibits significant wear and tear, experts strongly advise abandoning the shortcut entirely; stripping the compromised paper and painting the bare wall remains the superior and more durable choice.
Furthermore, painting over wallpaper that is peeling in multiple locations is heavily discouraged, even if the paper itself is not physically torn. Peeling edges or bubbling sections indicate that the integrity of the original adhesive paste is failing. This deterioration can stem from a variety of factors, ranging from the use of low-quality paste during the initial installation to underlying moisture issues within the room that continue to compromise wall adhesion.
While widespread peeling signals a complete failure of the substrate, localized damage offers more room for maneuver. If the peeling is restricted to a single, isolated area, it is often possible to carefully re-anchor the paper using specialized wallpaper paste before moving forward with any painting preparations. This corrective measure must be executed with precision to prevent the formation of trapped air bubbles beneath the surface, and the newly pasted section must be allowed to dry completely before any subsequent layers are introduced.

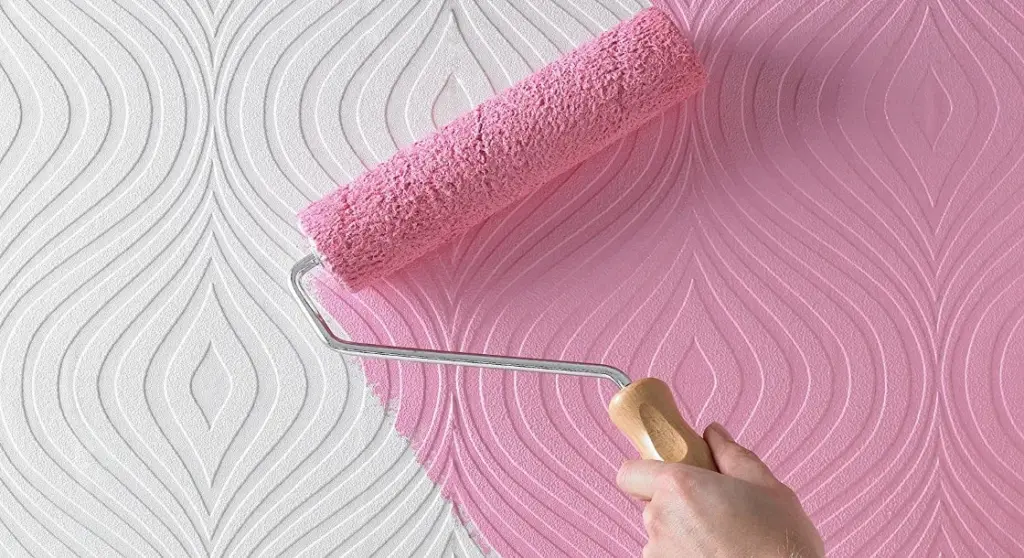
Regarding the choice of wallpaper, plain and flat designs serve as the most receptive surfaces for a coat of paint. Textured or heavily patterned papers can still be painted over, but decorators must accept that the underlying texture, embossing, or pattern relief will remain distinctly visible beneath the new color, transforming the visual dynamics of the finished wall rather than erasing them.
Preparing Wallpaper for Painting
Assuming a thorough inspection confirms that the existing wallpaper is stable, dry, and securely adhered, the preparatory phase before actual painting remains relatively straightforward compared to a full stripping job. Protecting surrounding fixtures, trim, and flooring with high-quality decorator’s masking tape is essential to achieving clean lines and preventing accidental spills or splatters. With the room properly safeguarded and cleared of obstacles, the focus shifts naturally toward surface conditioning and priming.
Priming Wallpaper for Painting
Even when working with light-coloured, unpatterned, or seemingly cooperative wallpaper, interior painting specialists strongly recommend applying at least one dedicated coat of primer before introducing the topcoat. Priming creates a uniform base that ensures a clean, professional finish, enhances color payoff, and significantly improves the overall coverage of the paper.
A critical technical consideration during this phase involves the choice of primer formulation. Water-based primers carry a significant risk when applied to wallpaper, as excess moisture can easily soak through the paper layers and reactivate or dissolve the underlying adhesive paste, causing the wallpaper to bubble, buckle, or detach entirely. To circumvent this risk, professionals recommend utilizing an oil-based primer or specialized multi-surface sealers, such as dedicated all-in-one primer and sealer products designed specifically to lock out moisture while preparing difficult substrates. Applying at least one—and ideally two—thorough coats of an appropriate primer, followed by complete drying time, establishes a stable foundation for the final color application.

How to Paint Over Wallpaper
With the priming phase successfully completed and fully cured, renovators can select their desired topcoat paint color and finish. Applying the topcoat follows standard interior painting methodologies, utilizing a combination of brushes for edges and corners alongside rollers for broader wall surfaces. Patience remains vital, ensuring that each coat is applied evenly and given adequate time to dry according to manufacturer specifications, thereby preventing sagging, streaking, or unintended reactivation of the layers beneath.
Problems With Painting on Top of Wallpaper
While careful planning and meticulous preparation generally yield a smooth, professional result, painting directly over wallpaper can occasionally present unique challenges. Fortunately, most of these issues can be successfully mitigated or corrected with targeted remedial work.
One of the most common complications involves the appearance of thin gaps between individual strips of wallpaper. As wallpaper dries and ages following its initial installation, minor shrinkage can occur, resulting in narrow fissures where the seams meet. While these gaps do not automatically derail a painting project, leaving them unaddressed will result in unsightly lines once the colored topcoat is applied.
Assuming the wallpaper itself remains structurally sound and firmly affixed to the wall, standard wall filler can be deployed to bridge and conceal these gaps between sheets. Industry best practices dictate that this remedial filling should occur after the application and curing of the primer coats. Once the filler has set completely, it must be carefully and meticulously sanded back until it sits flush and level with the surrounding paper surface. Because any raised or uneven filler will be heavily magnified and highlighted once painted over, dedicating sufficient time to precise sanding is crucial for achieving an immaculate, professional finish before concluding the project.