Before committing to a paintbrush, experts emphasize the critical necessity of thoroughly inspecting the current state of the wallpaper. The foundational rule for this home renovation shortcut is that the underlying paper must be in structurally sound condition, entirely free from rips, tears, or extensive damage. When wallpaper has deteriorated significantly, stripping it completely and addressing the bare walls beneath remains the superior course of action. Attempting to apply layers of paint over a compromised surface typically leads to bubbling, warping, and premature failure of the new finish.
Furthermore, homeowners must check for signs of lifting along the seams and edges. Painting over wallpaper that is peeling in multiple locations is strongly discouraged, even if the paper itself is not torn. Widespread peeling usually indicates that the adhesive paste behind the paper is losing its structural integrity. This failure can stem from the use of inferior paste during the original installation or from underlying dampness and moisture issues within the room, both of which will invariably ruin a fresh coat of paint if left unaddressed.
While widespread peeling demands a complete overhaul, localized lifting presents a different scenario. If the peeling is strictly confined to a single, minor area, it is often possible to salvage the wall by carefully re-securing the loose section with fresh wallpaper paste. This remedial step requires patience and precision to prevent the formation of unsightly air bubbles beneath the surface. Crucially, the repaired section must be allowed to dry completely before any primers or topcoats are introduced to the area.
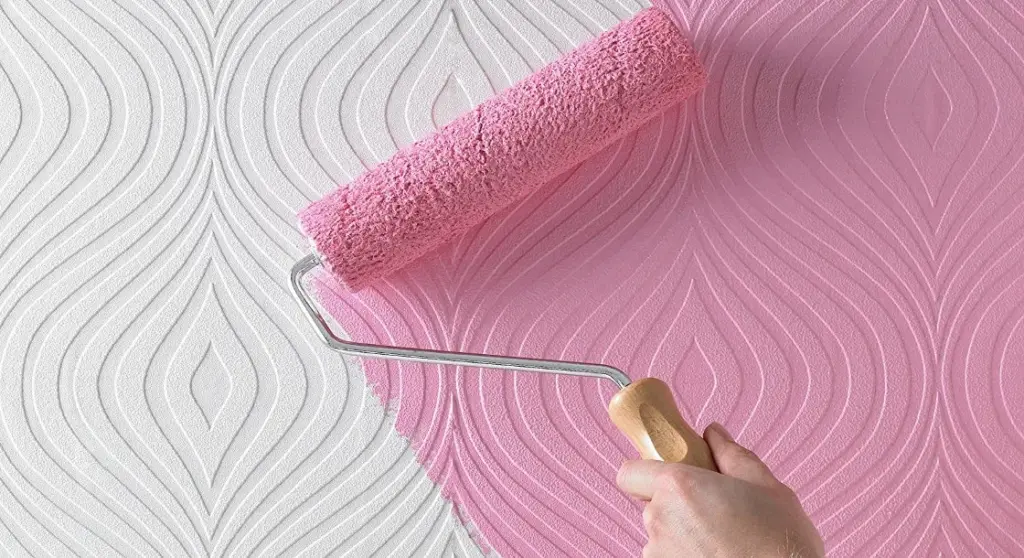
Regarding the texture and pattern of the wall coverings, plain and flat wallpapers are inherently the most suitable candidates for a direct paint application. Nevertheless, textured and heavily patterned papers can also be painted over successfully, provided the property owner is comfortable with the underlying relief and pattern remaining visible beneath the new color scheme. The visual texture will not disappear entirely, but a uniform coat of paint can successfully modernize the color palette of an otherwise dated room.

Preparing Wallpaper for Painting
Assuming that the preliminary inspection confirms the wallpaper is stable, clean, and firmly adhered, the initial preparation phase before painting is relatively straightforward. The primary objective during this stage is to ensure the surface is entirely free from dust, grease, and household grime, which would otherwise prevent primers and paints from bonding correctly. A thorough wipe-down with a damp cloth and a mild detergent solution is usually sufficient, provided the walls are given ample time to dry completely before any chemical treatments are applied.
Protecting surrounding woodwork, fixtures, and flooring is another essential preliminary measure. Applying quality decorator’s masking tape along baseboards, door frames, and ceiling lines ensures clean, professional-looking edges once the rolling and cutting-in phases commence. With the room properly prepped and protected, the project can transition smoothly into the critical priming phase.
Priming Wallpaper for Painting
Even when working with light-colored or unpatterned wallpaper, applying at least one coat of primer is universally recommended by finishing professionals. A dedicated primer serves a dual purpose: it establishes a uniform base that ensures a clean, professional finish for the topcoat, and it seals the surface so that the decorative patterns do not bleed through the new paint layers.
The choice of primer is of paramount importance when working over papered walls. Water-based primers carry a significant risk of soaking too deeply into the wallpaper, reactivating the old adhesive paste, and causing the paper to loosen or bubble. Consequently, professionals consistently recommend utilizing an oil-based primer or a specialized shellac-based sealer for this specific application. Products designed explicitly for challenging surfaces, such as all-in-one primer and sealer formulations, provide the necessary barrier to isolate the wallpaper and create an optimal foundation for modern emulsion or acrylic topcoats.
Property owners are advised to apply a minimum of one coat of primer, though two coats are often preferred for deeply colored or heavily patterned backgrounds. As with previous steps, the primer must be allowed to cure and dry completely before the final color is introduced.

How to Paint Over Wallpaper
With the preparatory sealing completed and thoroughly dried, the transformation enters its final phase with the selection and application of the chosen topcoat color. Standard painting techniques apply, but care must be taken not to overload rollers or brushes with excessive moisture, as the underlying layers can still be sensitive to prolonged saturation. Applying multiple thin coats rather than one thick, heavy layer helps maintain the integrity of the wall covering while achieving a rich, even color payoff.
Problems With Painting on Top of Wallpaper
While proper planning and meticulous preparation generally yield a successful result, certain issues can occasionally arise when painting over wallpaper. Anticipating these potential complications allows renovators to address them swiftly before they permanently impact the appearance of the room.
Gaps Between Wallpaper Strips
When wallpaper is installed initially, it is laid down with tight seams. However, as the adhesive dries and the paper contracts over time, microscopic shrinkage can occur, resulting in thin gaps between adjacent strips of paper. While this phenomenon is a normal part of the aging process for wallpaper, it becomes immediately noticeable once a uniform coat of paint is applied over the contrasting wall color beneath.
Fortunately, this minor aesthetic flaw can be corrected without stripping the entire room. Assuming the rest of the wallpaper remains securely fastened to the wall, a standard wall filler can be employed to bridge the gaps between the sheets. To achieve a seamless look, this corrective filling should ideally take place after the primer has been applied and allowed to set. Once the filler has cured fully, it must be sanded back meticulously until it is completely flush with the surrounding paper surface. Because any raised filler will catch the light and show up prominently under a fresh coat of paint, taking the time to sand the area down smoothly is essential for a professional finish.