Choosing to paint over existing wallpaper has long been debated among interior designers, contractors, and do-it-yourself homeowners alike. As a method for revamping a residential or commercial space, it is often touted as a significantly quicker alternative to the labor-intensive process of stripping old paper, preparing raw plaster, and painting bare walls. However, industry professionals emphasize that while the shortcut can save considerable time and effort, it requires a careful assessment of existing conditions and meticulous preparation to avoid costly pitfalls down the line.
Before deciding to pick up a roller and apply a fresh coat of color directly onto wallpapered surfaces, property owners must conduct a thorough inspection of the walls. The primary prerequisite for this technique is that the underlying paper must be in sound condition, completely free from significant rips, tears, or structural degradation. When wallpaper has suffered extensive damage, attempting to paint over it is rarely a viable solution. In such cases, experts strongly advise undertaking the arduous task of stripping the material entirely and painting the bare wall instead.
Another critical warning sign involves peeling wallpaper. Even if the paper is not torn, painting over sections that are actively detaching from the wall is ill-advised. Peeling generally indicates that the adhesive paste behind the paper is beginning to fail. This failure can stem from a variety of factors, including the use of substandard paste during the original installation or, more commonly, the long-term presence of dampness and moisture within the room.
Nevertheless, minor issues do not automatically rule out the technique. If peeling is strictly localized to a single, isolated area, it may be possible to salvage the wall by carefully re-sticking the loose paper using fresh wallpaper paste prior to painting. Professionals recommend executing this step with precision to avoid trapping air bubbles underneath the surface, followed by allowing ample time for the adhesive to dry fully before introducing any liquid coatings.
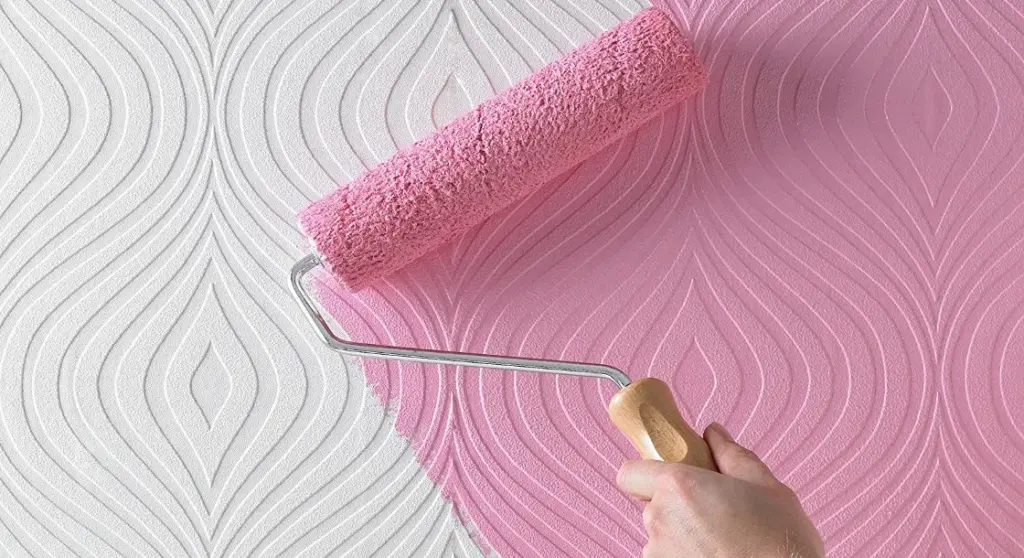
The physical characteristics of the wallpaper also dictate the final aesthetic outcome. Plain, flat wallpaper provides the most uniform and predictable surface for a paint application. However, homeowners are not strictly limited to smooth finishes; textured and patterned papers can also be painted over, provided the occupants are comfortable with the underlying texture remaining visible through the new coats of paint.

Preparing Wallpaper for Painting
Assuming a thorough inspection confirms that the wallpaper is structurally sound, clean, and securely adhered, the preparatory phase for painting is relatively straightforward compared to traditional wall restoration. The foundational work largely centers on cleaning the surface to remove accumulated dust, grease, or grime that could otherwise interfere with paint adhesion, alongside protecting surrounding woodwork, fixtures, and flooring with high-quality decorator’s masking tape.
Once the environment is properly secured and prepped, the focus shifts to the critical stage of priming the surface before introducing the final color scheme.
Priming Wallpaper for Painting
A common mistake made by novices is bypassing the priming stage, particularly when dealing with light-coloured or unpatterned wallpaper. However, industry standards strongly recommend applying at least one coat of primer to achieve a professional, clean finish and to make the underlying paper easier to mask and cover with the topcoat.
The choice of primer is of paramount importance when working over paper substrates. Water-based primers carry a distinct risk; because paper is porous, the moisture from water-based formulas can soak excessively into the wallpaper and reactivate or compromise the integrity of the original paste underneath. To mitigate this risk, professionals consistently recommend utilizing an oil-based primer or specialized sealing products specifically engineered to prepare wallpaper for painting. Solutions such as all-in-one primer and sealer formulations are frequently utilized to lock down the surface securely.
Experts advise applying at least one, and ideally two, coats of this protective layer, ensuring that each application is allowed to dry completely before moving forward with the decorative painting process.

How to Paint Over Wallpaper
With the primer fully cured and the walls properly sealed, homeowners can select their preferred topcoat paint color and commence the final phase of the room transformation. Applying the paint requires standard rolling and cutting-in techniques, though maintaining a consistent wet edge and avoiding excessive saturation of the wall remains crucial to prevent any delayed moisture damage to the underlying wallpaper paste.
Problems With Painting on Top of Wallpaper
While proper planning and rigorous preparation generally ensure a smooth process, certain complications can occasionally arise when painting directly over wallpaper. Fortunately, experienced renovators note that most of these issues can be successfully resolved with minor remedial work.
Gaps Between Wallpaper Strips
One of the most frequent challenges encountered after painting is the appearance of thin lines or gaps between adjacent strips of wallpaper. When wallpaper is initially hung, the paper expands slightly due to the moisture in the paste. As it dries on the wall, it can sometimes contract or shrink back marginally, creating narrow fissures between the seams.
While this shrinkage is not catastrophic for a painting project, it cannot simply be ignored, as topcoat paint will highlight the discrepancies. Assuming the remainder of the wallpaper is secure and firmly affixed, these gaps can be successfully concealed using standard wall filler. Professionals recommend performing this corrective step only after the primer coats have been applied and allowed to set.
Once the filler is applied into the gaps, it must be meticulously sanded back until it is perfectly level with the surrounding paper surface. Because any raised filler or uneven patches will be starkly magnified once the final color is applied, taking the time to sand the area down smoothly is essential for achieving a polished, professional finish.