For many homeowners looking to refresh a living space, the thought of stripping old wallpaper can feel like a daunting and exhausting chore. The process traditionally involves soaking, scraping, steaming, and repairing the exposed plaster underneath before any new decoration can even begin. As a quicker alternative, choosing to paint directly over existing wallpaper has long been considered a tempting shortcut to revamping a room. However, industry professionals and interior specialists note that while the method can save significant time and effort, it requires careful evaluation of the wall conditions and adherence to specific preparation steps to avoid costly and unsightly mistakes.
Before committing to a paintbrush and roller, homeowners must thoroughly inspect the current state of their walls. The foundational rule for this home improvement shortcut is that the underlying wallpaper must be in sound, stable condition and entirely free from major rips, tears, or structural damage. If the paper is severely compromised, weathered, or damaged, attempting to paint over it is rarely a successful endeavor. In such cases, experts advise that taking the time to completely strip the wallpaper and treat the bare wall remains the superior and more durable choice.
Another critical warning sign to look for is widespread peeling. Even if the paper does not feature obvious tears, if it is lifting away from the wall in multiple areas, it indicates that the adhesive paste underneath is failing. This loss of adhesion can stem from several underlying issues, ranging from the use of low-quality paste during the original installation to moisture ingress and dampness within the room itself. Painting over wallpaper that is actively losing its bond will only accelerate the failure, as the added weight of the primer and paint moisture will cause the paper to bubble, sag, and detach completely from the surface.
In situations where peeling is minimal and strictly localized to a single, isolated spot, a temporary fix may be possible. Homeowners can carefully re-anchor the loose edge using specialized wallpaper paste, smoothing it down meticulously to prevent trapped air bubbles, and allowing the area to dry fully before introducing any liquid coatings.

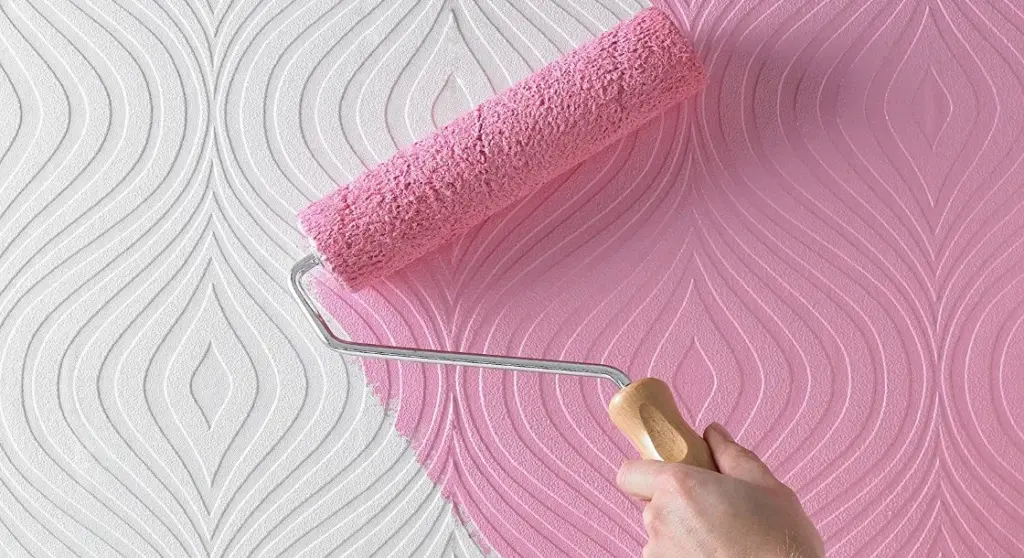
When evaluating the surface texture, flat and plain wallpapers present the most straightforward canvas for a paint makeover. However, patterned or textured papers can also be painted over, provided the homeowner is comfortable with the underlying design relief or tactile pattern remaining visible through the new color coat.
Preparing Wallpaper for Painting
Assuming a thorough inspection confirms that the wallpaper is firmly adhered, clean, and structurally sound, the preparatory phase for painting is relatively straightforward compared to a full stripping job. Ensuring the surface is dust-free and properly masked off around skirting boards, window frames, and fixtures establishes the necessary foundation for a clean application. Once these standard protective measures are complete, the focus shifts directly to priming the surface.
Priming Wallpaper for Painting
Even when dealing with light-colored or unpatterned wallpaper, applying a dedicated primer coat is widely regarded as an essential step rather than an optional extra. A proper primer ensures a uniform, clean finish when the topcoat is applied, while simultaneously sealing the paper to make future coverage easier and more predictable.
A frequent pitfall for amateur decorators is choosing the wrong type of primer. Water-based formulas can easily saturate the wallpaper, reactivating the old paste underneath and causing the paper to bubble or peel away from the wall. To circumvent this risk, professionals consistently recommend utilizing an oil-based primer or a specialized sealing product designed explicitly for wallpaper preparation, such as all-in-one primer-sealer formulations that lock out moisture. Applying at least one—and ideally two—thorough coats of primer, allowing adequate drying time between applications, safeguards the structural integrity of the paper before the final decorative color is introduced.
How to Paint Over Wallpaper
With the priming stage successfully completed and fully cured, homeowners can proceed to select their preferred topcoat color and finish. Applying the topcoat over the sealed wallpaper surface follows standard interior painting techniques, using rollers for expansive wall areas and brushes for cutting in around edges and corners.

Problems With Painting on Top of Wallpaper
While meticulous planning and proper preparation generally yield successful results, certain challenges can occasionally arise when painting over wallpaper. Recognizing these potential issues early allows homeowners to address them before they compromise the final aesthetic of the room.
Gaps Between Wallpaper Strips
One common issue involves the spacing between individual strips of wallpaper. When wallpaper is initially hung, strips are typically butted closely together. However, as the paper dries and contracts over time, it can occasionally shrink slightly, leaving thin vertical gaps between the sheets. While this shrinkage may have been barely noticeable on patterned or textured paper, the application of a solid-color coat of paint can instantly highlight these narrow fissures.
Providing the wallpaper remains firmly attached to the wall and is otherwise in good condition, these gaps can be successfully concealed using standard wall filler. Professionals recommend performing this remedial step after the primer coats have been applied and allowed to cure completely. Once the filler is applied to the gaps, it must be sanded back meticulously until it is completely flush with the surrounding paper surface. Because any raised filler will create a noticeable shadow or ridge once painted over, taking the necessary time to achieve a seamless, level finish is crucial for a professional-looking result.