Choosing to paint directly over existing wallpaper has long been debated among interior designers, contractors, and do-it-yourself homeowners as a time-saving alternative to traditional renovation methods. While stripping old wallpaper, preparing bare walls, and applying a fresh base can be an arduous, multi-day process involving chemical strippers, scrapers, and plaster repairs, rolling paint directly onto established wall coverings promises a significantly faster room transformation. However, industry professionals emphasize that this shortcut is not a universal solution. Successful execution requires careful evaluation of the existing material, targeted preparation, and an understanding of potential complications that can arise long after the final topcoat dries.
The decision to paint over wallpaper rather than removing it hinges entirely on the structural integrity and physical condition of the current surface. Before purchasing any supplies, property owners must thoroughly inspect the room for rips, tears, and overall wear. If the paper is severely compromised, damaged, or showing age-related deterioration, attempting to paint over it is generally discouraged. In such cases, stripping the compromised material and addressing the bare wall underneath remains the most reliable path to a lasting finish.
Furthermore, environmental factors and installation history play critical roles in determining whether a wall is ready for paint. Wallpaper that is peeling in multiple areas—even if the individual sheets remain untorn—signals a failing adhesive bond. This loss of adhesion is frequently attributed to low-quality paste used during the initial installation or ongoing moisture issues within the room, such as condensation or rising damp. Applying liquid paint to a substrate that is already detaching from the drywall will only exacerbate the issue, as the added weight of the wet coating typically causes the paper to sag or pull away completely.
In instances where peeling is isolated to a single, minor corner or seam, remedial measures can sometimes salvage the wall. Homeowners can carefully re-adhere the lifting section using specialized wallpaper paste, ensuring that air bubbles are smoothed out completely before the area is subjected to any moisture. Patience is critical during this phase; the repaired section must dry fully before any primer or paint touches the surface.
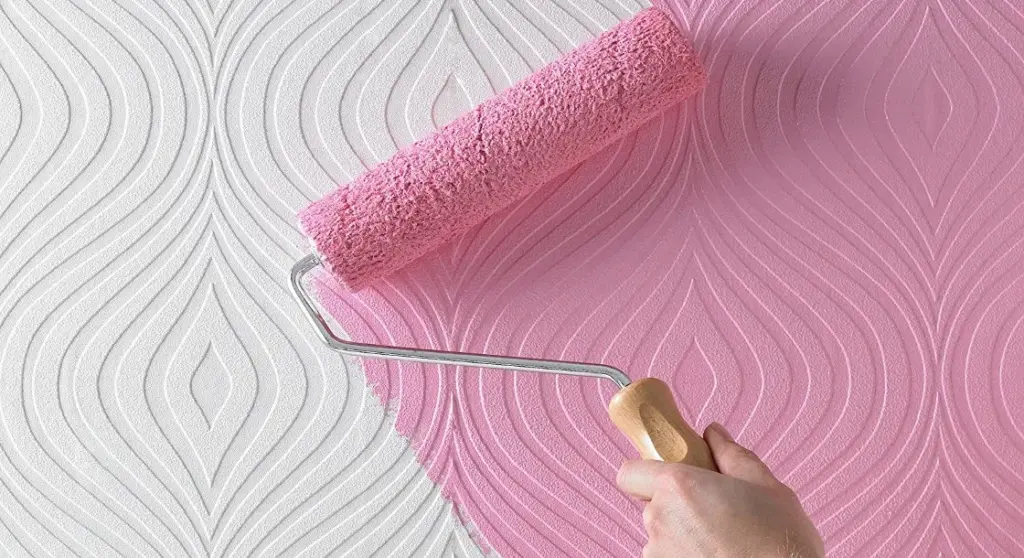
When evaluating the physical texture of the room, smooth and flat wallpaper provides the most straightforward canvas for a paint roller. Textured, embossed, or heavily patterned wall coverings can still be painted over, but decorators must accept that the underlying dimension will remain visible through the new finish. For some property owners, this adds a subtle, tactile depth to the walls, while others prefer a completely uniform, flat appearance.

Assuming an initial inspection confirms that the wallpaper is structurally sound, clean, and firmly attached, the preparatory phase leading up to the actual painting process is relatively straightforward compared to full-scale wall stripping. Protecting adjacent woodwork, flooring, and fixtures with decorator’s masking tape remains an essential step to ensure clean lines and prevent accidental splashes during the application phase.
Preparing Wallpaper for Painting
Even when dealing with light-coloured or unpatterned wallpaper, applying at least one coat of primer is strongly recommended before introducing a colored topcoat. Primer serves a dual purpose: it establishes a uniform foundation that neutralizes underlying patterns and creates an optimal surface texture for the final paint layers to adhere to.
A common pitfall during this stage involves the selection of the primer itself. Water-based primers can easily reactivate or soak too deeply into the old wallpaper and the underlying paste, potentially compromising the adhesive bond that keeps the paper attached to the wall. To mitigate this risk, professionals consistently recommend utilizing an oil-based primer or a specialized high-performance sealer. Products such as the Zinsser all-in-one primer and sealer are frequently utilized in these scenarios to block residual stains, seal the paper against moisture absorption, and create a stable barrier.
Industry standards suggest applying at least one thorough coat of primer, with two coats providing optimal coverage for darker or heavily patterned backgrounds. As with any preparatory layer, the primer must be allowed to cure and dry completely before any topcoat paint is applied.
How to Paint Over Wallpaper
Once the primer has fully cured, homeowners can select their preferred topcoat color and begin the transformation process. The painting technique itself mirrors standard interior wall painting, utilizing a combination of synthetic brushes for cutting in around edges and trim, and medium-nap rollers to cover the broader wall expanses efficiently. Multiple thin coats of topcoat generally yield a more professional and durable finish than a single heavy application, reducing the likelihood of runs, drips, or uneven sheen levels.

Problems With Painting on Top of Wallpaper
While meticulous planning and preparation generally ensure a successful project, painting over wallpaper can occasionally introduce unique challenges. Anticipating these issues allows homeowners to address them proactively before they permanently mar the appearance of the room.
Gaps Between Wallpaper Strips
Even when wallpaper was meticulously installed, natural environmental shifts can cause paper to contract slightly as the original paste dries over time. This minor shrinkage frequently results in thin, hair-line gaps appearing between adjacent strips of wallpaper. While these gaps do not automatically ruin a painting project, ignoring them will result in visible fissures once the colored topcoat is applied.
Addressing these separations requires a measured approach, provided the surrounding wallpaper remains firmly affixed to the drywall. Standard wall filler can be effectively employed to bridge the gaps between sheets. However, timing is critical: this remedial work should always be executed after the primer coats have been applied and fully set.
Once the filler has cured within the gaps, it must be meticulously sanded down until it is entirely flush with the level of the surrounding paper. Because any raised areas of filler will create harsh, noticeable ridges when painted over, dedicating sufficient time to precision sanding is essential for achieving a seamless, professional-grade finish. By understanding the condition of the existing walls, selecting the appropriate sealing agents, and taking care of minor surface discrepancies, painting over wallpaper can serve as an efficient and durable method for updating interior spaces.